Thursday, October 23, 2008

A girly tote and new hat pattern.

As promised, shown is a photo of my grandmother's name embroidered (by her) in the quilt shown in a previous post. Ima Jean understandably went by plain ole Jean. ha. The embroidery seriously amplifies my love for the quilt many times - such a special reminder that the entire thing was handmade by my grandma.

It would be so very fun to make a quilt one day - pretty sure I would act selfishly and make it for myself (and Mr. Casey, of course). ;) Sara Leah and I had big plans for some quilting last winter / spring. Her grandmother had even volunteered to hold some quilting sessions and show us the ropes. We shamefully never took advantage and now Sara is living in Cincinnati, which will just make it a tad more challenging to craft together. I still have high hopes that we will manage to find some time to quilt one day - maybe cutting and piecing the top piece on our own and meeting up for a weekend to do the actual quilting. We shall see.


On another note, this is a little tote bag I made back in September for a coworker's birthday. The pattern is once again from Amy Karol's, Bend-the-Rules Sewing book. I slightly changed the dimensions of the pattern, but kept it the general size, which is really the size of a smallish purse. The fabrics are 100% Kelly - bright and funky - so I knew it would be a hit with her.

It's hard to see in the picture 'cause I'm certainly no photographer, but there are three different fabrics - one for the outside, one for the inside and one side of the straps, then the last one makes the other side of the straps and a pocket in the inside. I took another photo of the bag hanging, but can't seem to locate that one.

The lining is cotton flannel - a light color, so it doesn't show through. Amy suggests in her book to use cotton flannel in place of the various interfacings called for in most patterns, and so far I love it. It's a natural fiber, gives good structure and brillianty handles heavy washing and drying. For even more structure, I've also heard people talk of using a heavier weight fabric, like a cotton fleece, but haven't tried that yet myself.

Once again, I had much frustration at the very end of this project with the turning and flipping of the inside / outside pieces to be right-side out, lining-in. It wouldn't have been quite so bad, but this time I had handles to really throw me off. When everything is turned wrong-side, you insert the handles and sew around the top, then turn/flip through a small hole you leave. Well, the first attempt was really amusing - the handles somehow ended up on the inside of the bag. Good grief! It was so sad I had to laugh. This all naturally occurred around midnight on the day of her birthday, so I was pressed to finish and get it to her the next day at work. Of course, it wouldn't have been the end of the world if this didn't happen, but I was SO close, so had to give it another try.

After much thinking, the second try produced handles in the right location, but flipped the wrong way - the fabric I meant to be on the outside/top on the shoulder was facing into the shoulder. Ugh. My brain just doesn't turn and flip. I feel that it should, but it just doesn't. Now closer to 1am, I decide that while I'm not exceedingly happy with this result, Kelly won't know what my original intentions were, so I decide to just go with it. The truly sad thing is that I tried to write some notes to myself for next time, but I feel pretty sure that I could make the same mistakes all over again - it never really clicked, since like i said, no brain flipping and hardly any turning. Oh well.

For me, knitting is quite the confidence booster when compared with sewing. I guess there are just fewer foundational things to learn. With knitting, you learn the knit stitch and the purl stitch and everything else is just putting those together in different combinations to make some sort of pattern. Of course, I've never tried anything as challenging as say, a sweater, that has to be fitted is so many ways - the length, the neck, the torso, the sleeves. Gives me hives thinking about it, actually. Taylor is great at taking these leaps without so much as a blink - check out this sweater she recently finished for Marley (so cute!). Not sure if she's added the wooden buttons yet that Marley picked out in a NYC button shop - one is an etched Minnie Mouse, of course. :D

This hat was knitted for my stepdad's birthday and is so handsomely modeled by Senor Casey. Sometimes I forget to get a pic of things before wrapping and shipping them off, so was proud of myself for snapping this before it headed out west. Since my mom and Peter live in Oregon and have frigid winters, I doubled the yarn to make the hat extra thick and bulky and warm. It was also my first cable pattern, so finally used the cable needles purchased way back when. The pattern is from a book Angela picked up at the library - pretty sure it's this one. There are several fun cable patterns in this book, and I'm finally getting to the point that I can kinda make my own hat patterns - just doing a little math can translate any pattern to something you can use. I hate to even say this, but the key really is checking your gauge with a swatch, especially when you double your yarn or use a different weight yarn as I always seem to do.

Ok, so more on all that later. Maybe I'll do a pattern converting post for a hat one day to demonstrate. I could actually use a hat for myself - not that it really gets cold enough here to wear one, but you know, for traveling to cold places and such. ;)

Next, I'll post some pics to update on Ang's crafting. She has finished a couple of scarves - at least one that has already been gifted, so pics can post, and she just started a kickass embroidery project that I can't wait to post - might have to wait until after the holidays for that one - I have no idea if her sis knows about this blog.

Coolio.

Tuesday, September 2, 2008

The Kitchen Post, Chapter 1 - with special craft room guest, Around the World Quilt a la Ima Jean.

So, first off, thought I'd post a pic of the finished kitchen towel - dubbed, the alien towel. It has the bias tape applied - 'the making of' detailed in the previous bloglet. It's hard to tell from the photo, but the finishing is done with a zigzag stitch in yellow thread for a fun, easy accent.

I have some other (comletely borrowed) ideas for more embroidered kitchen towels in the future, but these aren't even on my list o' craft projects, so we'll just hope I remember them years from now when the list is up for parole and happens to make it out on good behavior.

'The Kitchen Post' will document efforts to create a greener kitchen. This undertaking was begun many months ago and basically involved ridding the kitchen of paper products, most notably paper towels and paper napkins. Somewhere between 5 & 10 dishcloths have been finished one by one - usuallly an afternoon break from a larger knitting project. These were just finished during a long drive to and fro Oklahoma to visit my dad, grandparents and great-aunt. The unique and nifty thing about them is the knitting / crochet combo - first time for that (for me). I bought a crochet needle a while pack from Purl Soho with plans to learn some edging / finishing techniques, and I love the look of the dishcloth edged with a contrasting color - so fun!

The edging stitch shown on the dishcloths is a simple single crochet stitch. Examples, tutorials, etc are all over the web and I'm feeling too lazy to locate and post one right now (sorry!) - the one I used was printed out a while ago - pretty sure it also came from purlsoho.com - there are great tutorials and free patterns on that site.

Also, you probably can't help but notice the beautimous quilt in the background.? The dishcloths were purposely staged on the quilt to draw attention to my newly most prized item --- a blanket, hand-quilted by my grandmother, Ima Jean Gray (maiden name Kyle). I had to lay on some daughterly guilt to persuade my dad to go ahead and pass it one more generation down the line. I'm so glad he gave it up to finally be used instead of just sitting in protective plastic - it's so gorgeous! It's already living in the spare bedroom at our house - I love it so much!!

One of the best things about it is the hand embroidered name and date she put inside, on the lining. It was finished in '81 - she's 88 years old this year. She doesn't remember putting her name in it, so that was an even more special surprise - I think I actually shrieked with joy when I saw her name inside. :-)

I'd like to show her embroidered name for sentimental as well as historical value, ;) but I seem to be having photography difficulty, so won't bother with it just now - will very soon do a follow-up post with this quilted-embroidery treasure, an update on the to-be-felted tote bag, and a photo of Angela's major knitting accomplishments as of late - she finished the scarf and matching hat for Tim, so look out for this new fall fashion when the weather turns a little cooler.

On another note, it was a bit alarming today to hang a complete and lengthy list of craft projects either started or planned for the near future. Two realizations have already come from this - one, I'm going to have to refrain from adding any more projects until a few are knocked out - ideally starting on xmas gifts by the end of the month; two, it's actually inspiring to see these project ideas, even if only a show of momentary motivation. It's a bit like wishful thinking to believe that all of these would ever be completed, but it's a great record on which to reflect later (in the least).

Monday, August 25, 2008

Finish Line for Sewing Machine Cover, plus Bias Tape Reborn.

I don't really think it's quite sunk in yet. Feels almost a bit miraculous. This project has been dang close to finished for SO many months. Extreme silliness. This was my very first sewing project - had several lessons from a wonderfully experienced sewing guru in the neighborhood and this is what I chose to learn with - she showed me how to read the patterns, mark and cut the fabric, gather the corners, sew on the bias tape, and so, so much more. It was great! Then, somehow with projects of all sorts popping up all over the place, it fell to the wayside. Now, everytime I've been in the craft room for the past several months, the mostly finished machine cover would get a pained glance followed by feelings of regret and determination to one day finish - and always with a sooner than later plan, especially on the days where the machine actually seemed most unfortunately and quite avoidably dusty.

So, now it's complete... ahhh. It only needs a quick final pressing just to finish it off and make it hang better. I really, really love it and had to take a pic asap to proudly show it off. Funny thing - I go in to take a photo and the battery is dead; camera shuts off; so, I go swap the battery pack and turn it back on; that battery is also dead - damn! so, I eject the battery, try turning it back on and quickly switch off the display to the screen and manage to eek out one last picture before the camera again shuts off with a message insisting that I replace the battery with one having charge. I count this eek out as a victory and load the photos with plans to do the posting on my lunch break tomorrow, but I'm still so excited to be finished with this project that I couldn't resist starting the post right away. ha! so not like me, really. Anyway, I will finish tomorrow with talk of the new bias tape making method that is super cool and much faster than the way I did it before.

Ok, so this method is actually from one of the packets Ms. Peggy Sue brought for me on a sewing lesson day. It explains how to make a continuous piece of bias tape, which I've read before, but just didn't really get it until this past Saturday.

First of all, the way I did it one other time was to cut sections of fabric wide enough for a double fold, but then ending up with a stack of bias tape segments needing to be joined. VERY long process. ugh! Plus, last time I did not actually make "bias tape" - it is simply "binding" unless you cut it on the bias, which means that is is diagonal to the selvage edge. Cutting something on the bias gives it some strength and stretch and allows it to move and hang better - it is most always used when making clothing or edging anything with a curve. I read that it's not really necessary to cut on the bias when edging something flat with straight 90 degree corners such as a kitchen towel - it annoys some people that you will tend to waste some fabric since you're marking on a diagonal and start with the first full strip between selvages for a continuous strip, thus discarding the excess on the ends. (Note: That last sentence to may not make much sense until the end of this little walk-through.)

Ok, so the first thing you do is mark the strips on the diagonal to the selvage. The easiest way to do this is to fold the fabric from one corner at the end of the selvage over to the other selvage side. This creates a 45 degree angle to guide the marking. I wanted 1/2" double-fold bias tape, so marked strips in 2" segments. Before marking, measure the edges of the kitchen towel that will be bound with the bias tape to figure out how long the continuous strip will need to be. After measuring the length of one strip, I figured that I would need a total of four long bias strips to make up the entire continuous length.

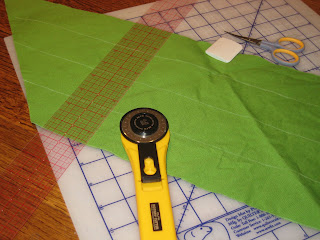
Now, for the fun part. So, you mark the strips, then cut off the excess (triangles on either side of the angled strips), then also cut 1/4" off each selvage edge (short strip ends) just to tidy up. This gets you to the photo above.

Next, you match up the short ends of the strips with right sides facing (or markings on the outside). Arrange them so one strip overlaps at each end - so they're offset by one strip width - and pin. The photo doesn't show it too well, so if it's not clear yet, hopefully it will be after the next step.

So, the whole point of the overlapping strips is to create a spiral of sorts. Once happy with the way the short strip edges are lined up, sew a 1/4" seam on this edge and press the seam open. Now, if you start at either end and cut following the line markings, you will cut in a spiral pattern creating one very long piece of 2" bias strip. When cutting over the seam, just focus on getting from the end of one mark cross-wise to the beginning of the next mark - it's a little awkward that it doesn't seem straight across the seam after sewing and pressing open, but I promise it turns out perfectly fine once you cut the long piece and press in the foldings.

The last part takes some practice and some patience, but basically you have your iron set on the hottest setting for the fabric you're using and pull the strip(s) slowly while pressing on the folded end as it comes through. You can either use a bias tape making tool or I've just been marking the right width and setting up a makeshift tool with a long, straight pin on the ironing board. This first fold has each side tucked inward to meet in the center.

From time to time, the folds start to get off (uneven) and you just have to set down the iron, pull it backward a bit, straighten the fold with your fingers, then start pulling through and pressing the fold again. Once the entire strip length is pressed once, press the last fold by just halving once more. See last pic of finished product wrapped around another package of the store-bought stuff.

Now, it's ready to apply. I won't post those general bias tape instructions here, since I don't have pics to go with, but the Posie Gets Cozy blog has this tutorial I learned from and she even gives clear instructions for mitering the corners.

Maybe the bound and finished kitchen towel will make it into a future post - I'll try and remember to do that.

Buttons galore, and Felted tote - Part I


There are two things I've wanted to do for quite a while now - one, somehow straighten the photo diplay on the shelves in our den and two, craft with buttons. So, decided to kill 2 birds, as they say... ;) Danielle so generously shared her button supply with me earlier in the year - she gave me this entire enormous jar of assorted buttons - so awesome!!! I love buttons and this jar o' buttons was especially fun since it contains every size and shape you could possibly imagine.

Several months ago, I started wondering more about button crafts - searched around online some to see what people have done with them before and found a post (have no idea where anymore) where someone made a sort of bulletin board decorated with buttons. I thought it was interesting, but had no use for a bulletin board really.

Then, it hit me a while later while looking at the hodge podge of picture frames jumbled and crammed all together on the little built-in bookcase of our den. I felt like I had to get the pics out of the frames and displayed another way - there were just too many frames all stuck together that it was starting to hurt my brain to pass by that area. (Ok, so I'm feeling a tad dramatic about it at this point...) Anyway, I loved that the photos were in the den - it makes me happy to have all the photos out in our main hang-out area, but it was just too dang messy, the frame clutter distracting from the photos themselves.

So, back to where it hit me... well, once I realized that I wanted the pics out of the frames, I remembered the buttony bulletin boards and started gathering supplies. I bought the el-cheapo set of cookie sheets (3 different sizes in one pack for like $3.99), some cement glue from the craft section and some magnets also in the craft section - oh, plus a roll of contact paper and some spray paint (everything in one trip to walmart).


I actually bought one can of primer spray paint and one of color, since the paint was going on metal cookie sheets. I wasn't very happy with the color selection in the spray paint section or the choice in contact paper, but all these things were really just the supporting actors to the pretty buttons, so I tried not to care as much.

The actual assembly was easy peasy. After the spray paint is dry, just mark and cut a piece of contact paper to go in the cookie sheet center, then glue buttons all around the edge of the sheet, .. and presto, on to the really fun part - arranging the pics! Then, just made sure to have enough magnets topped with buttons to hold the photo collage securely in place, cleaned off the shelf and set up shop.

I really love having all my favorite photos arranged this way! It's obviously still very busy, but now I feel like it draws your attention into the photos and makes it more fun to look at them. There's still one more sheet to go, but that means I also have to clean off the most messy, cluttery shelf of them all, plus print off some more recent photos to display, so that could be a little further down the road - we'll see.

Some things I did differently for the second sheet after learning from the mistakes of the first - put the tinest buttons on the bottom edge so that the buttons don't get in the way of the display sitting on the shelf. The sheet on the top shelf is actually propped up a bit on a couple decks of cards right now, since I overlooked this potential problem. Also, the buttons adhere best with a dab of cement glue on both surfaces; i.e., on the back of the button and on the edge of the sheet where the button will be placed.


Now, the last photo deserves some chatter. First of all, you won't be able to help noticing my rockin' new knitting bag. How cool is that? Sara Leah made it for my birthday and I love it very much - it housed this latest knitting project over our recent trip to the left coast, so is already rather well-traveled. It's really the perfect knitting bag with plenty of room for tons of yarn and plenty of pockets for misc other supplies. I actually used it as my carry-all bag for the trip, complete with yarn, wallet, maps and a pullover.

Also, in the pic is the beginning of what will eventually be a felted tote bag - yippee! The bottom and a smidge of the sides were done on the plane to and fro SF. I'm about halfway finished at this point and can't wait to try my hand at felting - wahoo!!! I will of course be devastated if it doesn't go well after all the knitting with all the gorgeous yarn, but surely that won't happen. ;-) This yarn was purchased last summer in a really cool shop in Atlanta called Knitch. Once through last year's holiday crafting season, it took me this long to clear out some other projects and get set up for this one. So, I'll keep posting the progress for this one - would love to be ready to felt in another month or so - here's hoping. :)

Friday, August 22, 2008

Dueling Machines, and The Spawning of the Robots.


Yay, Robots!!!!!

Angela and I worked on a set of gifts for Jim and Sara Leah off and on for several months - finally gifting the entire crafty accomplishment the night of Jim's birthday party.

The whole set is for their new kitchen and includes two decoupaged bottles for olive oil and soap (or whatever they want to use them for), four placemats and four napkins. We had so very much fun making everything and learned some kick-ass sewing techniques along the way.

We've done the bottle decoupage once before and have both wanted to give it another whirl. Once the robot ribbon was discovered, it sealed the deal that this craft would be part of the wedding gift extravaganza.

So, the bottles shown first are after the fabric decoupage, but before the "glazing" process - basically, a bazillion coats of polyurethane. We didn't look into it too much before-hand, but now know there are better options out there for sealing and glazing the bottles - would get more serious about that next time for sure. It was a little scary at first to see the dramatic robot ribbon fade into the background after the poly. started soaking in, but you can definitely still see the little guys and we thought the bottles turned out great overall. :-)

Of course, the most fun part of the process is cutting out the fabric pieces, then piecing together the colors and patterns on the bottles. It's simple enough to be a kid-friendly craft, I think - the fabric pieces being pre-cut for the littler ones.

As for the placemats and napkins - the core tips, techniques and patterns came (once again) from Bend the Rules Sewing by Amy Karol. We mostly followed her instructions for the placemats, but naturally, the patterns were modified some to fit our needs - with most of the creative juices going into the napkin-making.

To me, the best part of the whole affair was the dueling sewing machines. Mine is portable, so I brought it over to Ang's and we set up in their dining room where her super rockin' Singer lives in a beautiful antique machine table. I love her machine - it's so simple and solid and no-frills, yet has every single feature you really need... and it's quirky - that's likely what I like about it the most.

So, several times, we brought the machines together, pulled the ironing board out of the laundry room and set up a mini sweat shop. Fun stuff. It was so dang cool to see the little oddities introduced to the project by our unique sewing styles. ..and it was freaking hilarious to see our different ways of handling mistakes - and oh, there were a plenty.

We really wanted the napkins to feel like napkins - not too thick - but wanted the robot fabric top pieces backed in order to hide the seams. So.. we decided to sew a top piece with red fabric framing blue robot sections and use another thin bottom piece for backing. Then, really going wild, decided to go with bias tape on the seams and some random-ish zigzag stitches across the top of the entire napkin in a few lines.

This random topstitch method has the dual-purpose of a fun, decorative detail with the bright yellow accenting zigzags, and most importantly, it's intended to keep the napkins from bunching up through the washing / drying process. These items are for the kitchen and above all things must be functional. We've all had those things you love, but you never want to use - always dreading the time when a washing is in order, and even (eek!) a pressing to make it look good again.

In the end, all of the pieces were tied together with red, since that's the main color they picked for the kitchen, AND robots, of course. Sara Leah LOVES robots!! (and we trust Jim loves them, too.) ;D

Wednesday, July 23, 2008

June Birthdays, plus an Oh-So-Crafty Boyfriend!

Two of my favorite ladies have birthdays in June - Angela is the 8th and Sabrina is the 21st. For me, birthdays inspire crafty giving - it's so fun to tailor a gift to a special friend.

This zipper pouch was a ton o' fun to make for Ang! The pattern is from Amy Karol's, Bend the Rules Sewing. It's a great book with a ton of simple projects and has neat tricks for each one. If you use the book, be sure to get connected with the flickr group - there you'll find invaluable discussions on errata and techniques. If you're a sewing beginner like me, a little 'oops' in the book can really throw you off, so the group helps give you a sanity check before spending too much time freaking out and cursing. ;-)

I made a 'practice' zipper pouch before going for it with the one planned for Ang. I'm glad I did, but maybe should have made 2 practice ones (lol!) because I still had trouble with the lining the second time around - slip-stitched it too close to the zipper, so the zipper was terribly hard to open/close. So, had to gift it on her birthday, then had to 'borrow' it back and adjust it next time she was over for craft night. (Ha.) It still ended up a little closer than desired, but I figured out that it's because of how closely the outer fabric pieces were sewn onto the zipper - something to make note of for the next round of zip pouches. On another note - I just love the fabric! It's from Amy Butler's "Belle Collection" line. The earthy tones mixed with bright eye-popping colors are great.

Sabrina turned 30 this year - WOOHOO!!! Pretty crazy. We were out of town when her actual birthday transpired, but we met up soon after (the next weekend) in Athens, Ga - home of UGA, her Alma Mater - for a fun-filled weekend of brewery touring and bar hopping. This was finally our chance to visit the Terrapin Brewery, and it was awesome! We spent several hours there, listening to music, tasting some brews and touring the facility with our rockin' tour guide, Kelly.

I found biology themed embroidery patterns from this gal's etsy store quite a while back and bought them with Sabrina's bday in mind. The pattern came in pdf form, so I printed, then traced onto a tea towel to embroider.

I intended to give her two towels - one for each pattern - but didn't get that far along. The second towel is still in the works - should get to her by the end of summer (ok, so that's an optimistic estimate). :D I wanted to do some decorative edging to both, but didn't have time, so will definitely add some sort of stitch all the way around the edge of the second towel. Maybe a simple blanket stitch, or possibly the triangle stitch that they used to edge some napkins in this tutorial. We shall see...

On the homefront, one of the best thing we've done all year thus far is to build a "kitty gymnasium". I actually can't take much credit - we both drafted the design together, but Casey gathered all the materials and did most of the construction - I only helped hold things in place while he drilled and such, late in the process. He did an incredible job and the kitties LOVE it!!!


So, it's basically constructed of a base covered in carpet with three long posts (mailing tubes) covered in sisal rope in three corners of the base holding up the top level. The top level has a corner cut off which will eventually sit on top of a shorter post (about half the height) jutting from the fourth corner of the base. Hopefully that makes sense.

Sim can jump effortlessly from the floor to the top (which is a little over 3 feet high) and he'll sit up there all day. We were having so much trouble keeping him off the counters and knew he needed an elevated place where he is allowed to hang out - it's especially great to have him satisfied and out of my way when I'm trying to cook dinner. They both use the posts to preen their claws and also to climb up to the top level. Anyway, it's so freaking awesome! Many kudos to Casey, the oh-so-crafty boyfriend. ;-)

Monday, June 16, 2008

Wedding Preparations.

Whoa nelly - it's been a long time since the last post. If only you could see how many are in my 'Drafts' - just can't seem to get them rolled out - but no worries, eh?

So... we had a blast getting ready for Jim and Sara Leah's wedding. We've been hiding all sorts of crafty gifting projects from her, helping some with the little wedding necessities, and squeezing in some regular 'ole trusty craftiness in between.

On the left is a prime example of the numero uno crafty lady's product (for lack of a better word). She designed and crafted bride and groom fingerpuppets to top the wedding cake - they turned out perfectly, plus were a lovely and unique addition all of the weddingness that ensued.

In between wedding invitation week and wedding cake topper week, Lester Friedrich Francisco was born. Natalie gave SL a sock puppet making kit for her last birthday, and she been birthing sock creatures ever since. :-) I'm pretty sure this is the second one... ah, here we go - found the first little guy - pretty sure it's 'Mr. Fitzcreature' to me. ;)

The latest and final wedding craft was magnet making. We made a ton for wedding party favors and they turned out really cute. Sara Leah gathered a bunch of sketches she made over the months of her and Jim. She scanned and copied, then we cut, pasted to poster board, pasted to slightly larger sized color paper, then backed with strips of magnets. Sunni and Leah came over to help and with five people, we got an assembly line going and churned out gobs and gobs of magnets. So fun!


It seems like ages now since the wedding - Jim and Sara must be old married folk by now. haha. It was a dreamy day that deserves a final pic - congrats to Mr and Mrs Pihakis! :D

Monday, May 5, 2008

Knitting Progress.


So, there has actually been a TON of progress with our knitting projects - it's just been a tad gradual. :D


Finally finished Casey's scarf. He's pretty excited. It went something like this: Me, "Your scarf is finished! Woo-hoo!"; Him, "Great! I'll wear it to brew this weekend." Then, the room fills with laughter because, of course, it is May and no longer scarf season... Haha. Oh well. For now, he's thrilled to wear it around the house, and with any luck, he'll have a hat to go with it come next winter - now that's exciting! :-)

Holly is working on a blanket. None of us were quite sure how blankets go on knitting needles. I looked it up later, and it seems most people do larger ones on longer, circular needles, but for a small one it's fine to scrunch it up on a long, straight needle. Her colors are wonderful - I'm impressed at her color changin', too. When thinking of changing colors like that my mind gets bogged down with thoughts of weaving in millions of ends. Ha. How's that for lazy?

Anyway, plans were made to start a sort of hat knitalong - once everyone is ready to start a new project, we'll all start it together. Shouldn't be too far off. If Taylor isn't finished with her tank yet, it's gotta be close, and Angela is practically finished with her scarf for Tim - will post pics of Tim modeling very soon, so get ready. ;-) Also need a tank pic and will get the finished Holly blanket. We may need a brief break from knitting after that.. there's talk of an embroidery interlude. More on that later.

In other knitting news... my sock enthusiasm is missing - or maybe I just misplaced it. After ripping out the half-finished kiddie sock and starting a larger kid / adult size and managing to knit on the wrong side after turning the heel, I'm not much in the mood to finish the half-inside-out sock before trying to get the mate right. Plus, I'm finally seeing the difference between toe-up and top-down sock knitting. This one is supposedly a childrens size large. Naturally, I didn't knit a swatch or anything, so it happens to look like a giant hobbit's sock at the moment. I'm really mostly ok with it. This will be my first sock (if I ever finish it), so it's bound to have issues. When first reading about the toe-up method, it sounded ridiculous to constantly try on the sock for fitting purposes - I mean, can't you just measure and calculate and count? Not if you want it to actually fit your foot, it seems. I'm determined to find some resolve to finish this pair before moving on to the next one - thus rediscovering sock fanaticism... or that's the plan anyway. For now, it's back to the good 'ole dishcloths. Will be sticking with them until the sock fervor returns.

Saturday, April 12, 2008

Craft Night - Crashed.


Since I'm quite behind in posting, this is from a couple weeks ago...


We wouldn't even be able to refer to that night as a craft night if not for the super craftiness that Julie brought over. She toted in some metal art pieces that were recently poured, then finished them up with some paint. Very cool!

So.. Julie saved the integrity of craft night :) - and John, Tim, Ben, Jim, Casey and Ditchell crashed it. Haha. And we're oh, so happy they did! :D As if one needs a reason to drink and be merry with friends... John was back in town for a week, nearly a month after his move to Cincinnati - he has been missed and his visit prompted a gathering. (I know - shocker.)

Aside from Julie's metal art, the celebrated craft of the night was definitely of the brewing variety. John made a beer run on his way back to Bham, so we dedicated the night to craft-y brews. An impressive Belgian selection was hit pretty hard by the boys the night before, so we mostly enjoyed the harder to come by (in Bham anyway) American craft brews. I think my favorite was the super-crafty (hehe) Two-Hearted Ale from Bell's. Also from Bell's, the Expedition Stout was a close 2nd - that beer rocks! We always try to pick up some of their beer when we're up north - usually visiting my family in Wisconsin.. it's nice to know that it can be found in the Cincinnati area so the boys can pick it up any time they head up to visit Sir Springer.

Since this night, a number of special craft projects have been started. Some of those will have to remain a mystery for a little while, but there are several sewing projects in progress that will deserve posting when they're finished, or at least further along. :) So, more soon...

Cheers - to crafting of all sorts!!!

Friday, April 11, 2008

Embroidery Obsessed.

So much has been going on! Not surprisingly really, since it's been a month since the last post. I'll have to break up the craftiness into a couple of posts, so will start with an embroidery update.


For a couple of weeks, I was totally mad for embroidery! Finally finished this tea towel for myself that was started several months ago and then moved on to a huge project for my grandmother's 88th birthday. By huge, I mean literally huge. I ordered some of the flour sack towels from
P.O.S.H., and they are enormous compared to the tea towels from Sublime Stitching. I ended up liking them really well, but it kinda freaked me out at first - a very expansive embroidery landscape. ha. So, I folded it in quarters and ironed on patterns all over the dang thing. It took a couple weeks of seriously focused craft time to finish the embroidery, but it was well worth the effort. I was thrilled with the end result and truly enjoyed the whole process - picking the colors and just sitting wherever to chill and stitch - back patio, front porch swing, bed, sofa, ... it was relaxing and satisfying to just hang out while making progress and feeling increasingly excited to finish and send my work to grandma.

Speaking of my grandma, she is quite the crafty lady herself - painting and cross-stitching in her prime, plus she crocheted lord knows how many afghans and sewed enough clothing and costumes for my sisters and me to fill a closet. I think it's obvious where I got the crafting gene - and maybe even the too-many-hobbies-at-once gene - I'll have to see what she has to say about that. ;-)

Another exciting endeavor that was mixed into the embroidered towel project was homemade binding - so fun! I followed the tutorials for
folding bias tape without a tool and binding towels (plus general binding/bias tape discussion). Pretty sure I've linked to these before, but this was the first time I tried either. I was mostly pleased with the outcome - the corner mitering didn't work out exactly as intended and the binding folding was a little sloppy from time to time (it was a whole lotta binding to fold), but overall I was pleased with the first go. Since I was edging a towel, I just cut the fabric straight on the perpendicular to the selvage edge, so not really making bias tape. One of my next projects will be binding the edges of what I'm calling the 'alien invasion towel' with some cotton linen fabric, so will try cutting the fabric for that one on the bias. After cutting all those strips for the enormous flour sack towel, there was some major coveting of quilting mats and rotary cutters going on... this tea towel should certainly be a snap after that undertaking.

Also on the sewing front are the nearly finished sewing machine cover and hanging organizer. Whew, this project has been major in every way. I should be ready for the final stage by Sunday when the next sewing lesson is scheduled.

Aside from that, I'll be purchasing a zipper this evening for the cat tuffet and plan to have the outer piece sewed to the that point before Sunday, so Peggy Sue can give some zipper tips while she's here. Or who knows, maybe I'll be able to swing this one on my own after some reading and re-reading of
this tutorial. There are actually a ton of cool tutorial links down on the right where the zipper tute came from - so neato that all those crafty people out there take the time to teach others, complete with great step-by-step instructions and photographs - love it!

Ok. So, will post more pics of finished projects one day. :-)

Oh, and before I forget - one more embroidery note.. I followed this
tutorial to finally figure out french knots and now I love them - my newfound skill is definitely well-represented on grandma's towel. :) It was the only stitch I just couldn't seem to figure out from the little booklet in the Sublime Stitching starter kit - I needed a little somethin' extra and got it from The Purl Bee.

Tuesday, March 4, 2008

Craft Central @ Chez MoniCasey.


This little squirtblossom recently set me into action. He helped me realize that his room was overflowing with purpose. It began as my music room / craft room - although the only crafting taking place in there before was jewelry, as knitting requires no dedicated room. It seemed the most logical space to morph into kitty's room when he arrived a few months ago. Then, once sewing began after the holidays, it was obvious that fabric, patterns, and mr. purr-bucket do not mesh well.


.. and so the new craft room was born! A couple of hours were spent packing everything up and Casey helped move the furniture. Then, it was time to unpack and start arranging the goods (all to Sim's dismay - who isn't allowed in the guest bedroom, aka craft central).

I gotta say, it's great having a space to sew - spreading out fabric and patterns and leaving them there undisturbed as long as I want. This pic was taken right after moving into the new area and getting things ready for some marking and cutting - just in time for sewing lesson, part deux.

Notice the room post-lesson - already ripe with use. Since then, I've finished sewing the pieces for the sewing machine cover - wahoo! Now, time to get moving with the hanging organizer - need the pieces marked, cut and sewed for lesson 3 this Sunday. I'll post more pics once the bias tape adventure has begun.

Speaking of bias tape - I should link to some great tutorials Danielle pointed me to..
This one explains the difference between binding and bias tape, plus gives an excellent explanation of the process. This has some great ideas for binding / bias tape - very innovative. I haven't actually tried it yet, so can't give a first-hand account, but it can potentially save you from spending 10 bucks a piece for each size bias maker tool - gotta love that!

I actually bought some of that boring, solid color bias tape you find at Hancock Fabrics and imagine I'll use that for this first project. It'll save some time right now, but I can't wait to try out these other tricks and techniques for the next project that uses binding.

Mostly knitting.

Knitting was the big hit at craft night a few weeks ago (yes, I'm very behind in posting). Taylor is daringly making a gorgeous tank top with this very soft and colorful yarn. She is taking on a challenge that would be much too intimidating to me - a tank for her 2nd knitting project ever, using mostly a book with photos to guide her through new stitches - amazing!

It's so cool how people have such different crafting styles. Taylor is easily bored with simple projects - the girl needs a challenge, so she goes for it - so cool. I, on the other hand, take baby steps - learning new skills one at a time, slowly integrating them into new projects, usually after practicing a bit first and most certainly reading the directions a thousand times - pretty funny.

I also tend to have a million different craft projects going at once.. which honestly doesn't bother me, but I've learned from others that they could never work this way. Sara, the knitter of all knitters, for example, works one project at a time. I've not only got a scarf, socks and a dishcloth on needles right now, but have yarn bought for two other projects... not to mention embroidery that's loosely on a hoop and sewing that's always in the works. Ha. I feel it gives me options - I can decide day to day what I feel like working on and know they will all eventually get finished (theoretically). :-)

Taylor also brought over some tag blankets she's been making for a couple friends with new babies. What a great idea! Very silky - just what the new little ones need. (Disclaimer: please excuse the most unflattering pictures I have managed to take - photography is obviously not my forte, but you get the idea.)

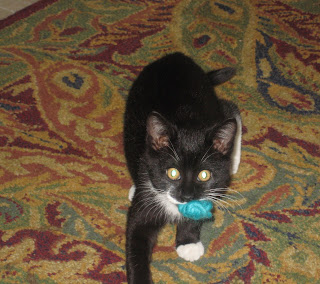
So, I also had to post this pic of Simcoe getting into Taylor's bag - he found a little hole on the side and before we knew it he was working his way in... he is also quite crafty it seems.

Thursday, February 14, 2008

Future Craft.


Angela had the great idea to do a post about future craft plans, so here goes..

First on the list would probably be embroidery. Danielle got me into it this past fall. She made that rockin' dishtowel in the pic. There's a really great website devoted to all things embroidery - they have incredible patterns (super cool designs) and fantastic kits for those of us who are just starting out. It's called Sublime Stitching and their tagline is, "This ain't your gramma's embroidery!" (pretty fun). I made a dishtowel (actually embroidered on a tea towel) for my mom for xmas, but forgot to take a pic as always, so maybe I'll get one posted of it eventually after a visit to the northwest. I'd like to back the stitching with fabric like Danielle did - it's a great way to protect your stitches if you feel like you should (I like the idea, although Jenny @ Sublime say it's unnecessary and she absolutely knows best), plus it adds a nice accent to your work. :-)

Oh, and I found a website through someone's blog (can't remember right now, who's it was) for some flour sack towels to embroider on at P.O.S.H. - they're 30 x 36" vs. the 26 x 28" tea towels - and a bit thicker cotton.

Next on the list is bottle decoupage. Angela and I did some a while back - we each did two, gifting one and keeping the other for ourselves. The one shown in the pic is the one I did and kept for myself - using it for dish soap. I sent the other one to my mom for her birthday with some olive oil (whoa, just realized how long ago we did those - my mom's bday is in May). Anyhoo, we 'borrowed' the idea from an artist at Naked Art in Forest Park. We just kinda guessed at what they did and tried a couple things until they turned out how we intended. I think they turned out great! I'm sure they'll be even better the second go 'round. The bottles are just plain clear ones from World Market - they have all shapes and sizes.

We also have chair recovering plans. Casey and I inherited a dining room set from the former owners of our house when we moved in, and one of the first home projects we did was recover those chairs. My mom actually did most of them with me when I was still looking for a job and she was visiting. She went with me to pick out a different fabric for each chair. I think we finished four out of the six before she had to fly home, and Casey helped me with the rest. It was so fun b/c it completely transformed the beautiful chairs. You can't tell from the photo, but the woodworking details on the chair are really nice - they just needed a fresh start. They're scattered around the house and I love them! :D Angela's ready for some recovering at her house, so we'll go at it whenever she says the word.

We also have plans to do some photoshoots with Eve. She's into photography, so we're hoping we'll learn a thing or two from her while participating in her process. Her photos are amazing - I've just started checking her stuff out on flickr and am uber impressed.

Tuesday, February 12, 2008

Knitting.

Knitting has been the object of my affection since the summer. First project was (naturally) a scarf in garter stitch. My first chance at sporting it came with a chilly weekend in Chicago (Sept. '07) for the Renegade Craft Festival, but the first pic I can find right now with it on is from the Holiday Ale Fest in Portland (Dec. '07).

After that I made a ridiculous 'To Do' list of knitting for xmas gifts. (Silly me.) I didn't cross off everything on that list, but did manage to take a hat class and knit a hat for little sis, Meg, then made legwarmers for littlest sis, Court (hope to post photos of those one day soon). Also, knitted 3 dishcloths for my mom to go with an embroidered kitchen towel (more on embroidery in another post). For some crazy reason, in the midst of all the holiday knitting I took a sock class... haven't even finished that first sock yet, but it's on the list. hehe. I wanted to make some socks for my grandma, but am now aiming to have some done by her birthday (mid-March).

Other than that I just finished some legwarmers for Danielle's birthday. I was so thrilled to see some
Lamb's Pride at Knit Nouveau in exactly her color - vibrant aqua! I loved how they turned out - used the same pattern as I did with Court's, but made them a bit smaller in an effort to prevent them from sliding down. Courtney's were sliders for sure, and for a number of reasons.. I loved how hers were so soft with washable wool, but the weight was heavier, so that combined with a loose fit made them sag down below the calf after a few steps. I'm hoping a little shrinkage from a washing and drying will solve that problem. If not, Sara Z in DC made a brilliant suggestion - a little strip of elastic at the top.. The other pic is of the gorgeous bag Sara had just finished knitting - she felted it at her sisters when we went to Baltimore that Sunday. It turned out terrific - fantastic shade of blue, scalloped edges, pretty ribbed strap and complete with a pocket inside. I was very impressed!


Angela and I have been trying to get together once a week for a craft night. We decided a couple months ago to try and organize a 'Circle of Craftiness' with the idea that we wouldn't confine the group to one craft (like knitting).. everyone brings the project of their choice, whatever they are inspired to work on for the night. It's been a ton of fun so far! Eve joined us one night for some sewing - she hemmed her first pair of pants while we looked on with interest. Sara Leah made it another time and worked on her second sock puppet. I need to get a pic from her - a friend gave her a kit for her birthday (will try and find out the name) and it turned out so very cute. Taylor should be joining us now that we switched to Mondays - can't wait to see what crafty things she's up to...

So, Ang and I have been knitting away. She's working on a scarf (first knitting project) for her husband. I have picked up, torn out and reinvented a scarf for Casey that sadly took a backburner to the frenzy of holiday knitting. She took a couple pics last night to show our progress. We're both about a third of the way there - not too shabby, I'd say. ;)